
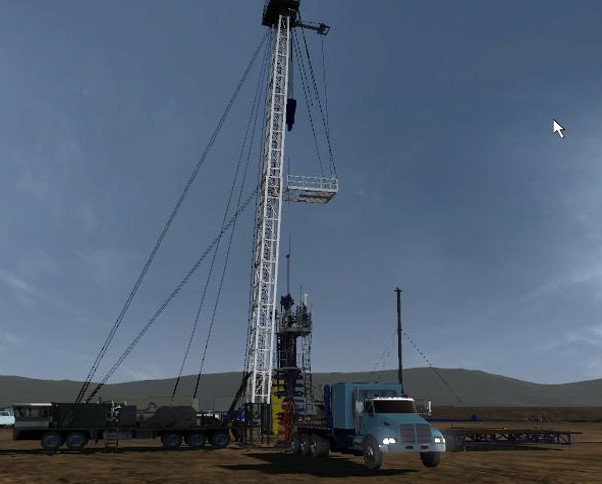
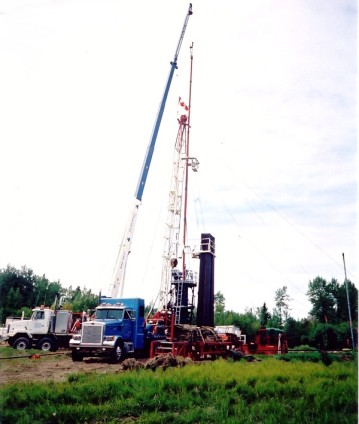
Typical Rig Assist Snubbing Operations
Our hydraulic rig assist service is a versatile tool that can be used in a wide variety of operations, utilizing rigs from a small single workover rig to a large triple drilling rig. Below are some actual rig assist operational examples that outline the process we typically use, from start of pressure operations to completion of the snubbing work.
“Slick String” Completion
“Land and Latch” Sand Clean Out
Lubricating out Tubing Conveyed Perforating Guns

“Slick String” Completion
Type of well: Sweet Gas
Depth: 750 m
Situation:
- A single workover rig installed a 179mm x 21mpa double gate Bop onto the 179mm x 14mpa tubing spool. The top ram was dressed with 60.3mm pipe rams and the bottom ram dressed with blind rams
- The well had 114mm casing that was swabbed down to ensure an underbalanced condition existed for the gas zone of interest at 700m
- Electric wireline operations were conducted
- A 3m section of the payzone was perforated
- The spent guns were pulled above the rig’s blind rams. Surface pressure indicated 7mpa. The rig’s blind rams were closed and locked. Wireline was released
Process:
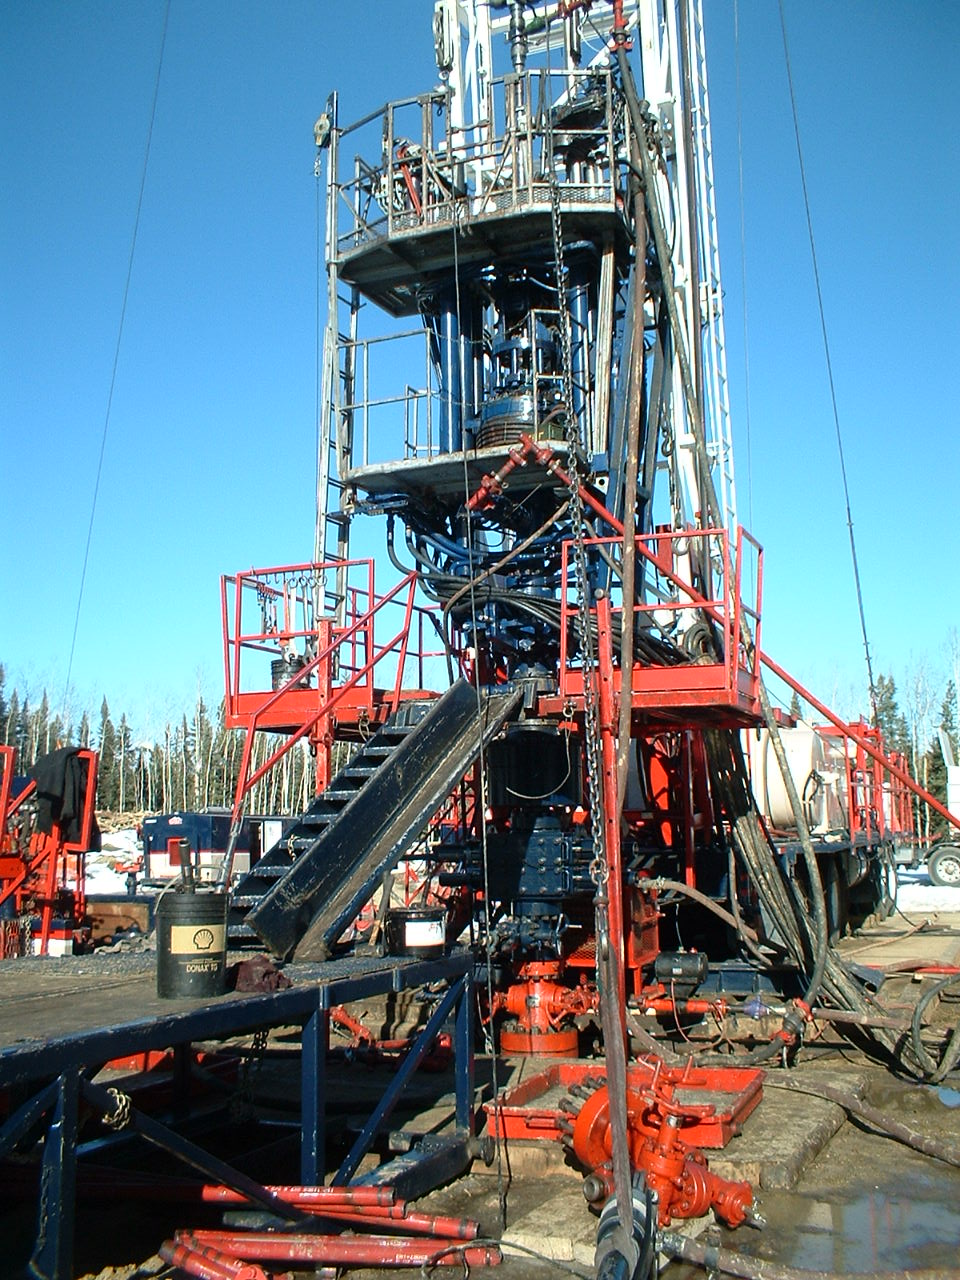
- A hydraulic rig assist was installed on top of the rig’s Bops
- All components on the unit were dressed for 60.3mm tubing
- The programmed completion called for a production string of 60.3 J55 EUE tubing
- Proposed downhole equipment consisted of the following: 60.3mm tubing knock out plug; 1 joint 60.3mm tubing; Baker “R” profile nipple; 3m x 60.3mm pup joint; 680m of 60.3 J55 tubing; tubing hanger
- Bottom hole assembly (BHA) was picked up and lowered into the snubbing stack till the knock out plug was just above the workover rig blind rams
- Snubbing unit stationary snubbers, traveling snubbers, and traveling heavy slips were engaged onto the pipe. The jack was used to take a strain into the stationary snubbers
- Snubbing unit annular was closed on the joint
- Utilizing the equalize line, the stack was pressurized with wellbore gas
- Unit was checked for any leaks. The top of the stabbing valve was observed for flow
- Lower stripping ram was closed on the joint, and the snubbing stack above it was bled off. The chamber between the rams and the snubbing annular was checked for flow. This ensured that the stripping rams were holding well pressure. Stack was re-equalized and the stripping rams were opened
- Workover blind rams were unlocked and opened
- Unit proceeded to snub in the production string. Approximately 30 joints were snubbed into the wellbore
- Pipe weight now overcame the force of the well pressure working on the cross sectional area of the 60.3mm tubing and began to fall into the well bore without having to snub it.
- Workover rig’s blocks now took control of the tripping operations. The well control was maintained with the snubbing unit’s annular preventor, and the heavy slips on the unit were used to allow connections
- The required amount of joints were tripped into the well
- Tubing hanger was installed on top of the last joint. A landing joint with a full opening stabbing valve on top was installed on the topside of the tubing hanger
- The tubing hanger and string were lowered to just above the snubbing unit annular preventor. The lower stripping ram was closed, and the stack above the rams was bled off
- The snubbing annular was opened and the string lowered to below the annular element. The annular was then closed, and the stack was carefully equalized above the stripping rams
- The lower stripping rams were then opened, and the tubing was lowered until the tubing hanger engaged into the tubing head
- The hanger hold-down screws were engaged onto the tubing hanger
- The entire stack above the tubing hanger was slowly bled off. A visual check at the kill spool valve was made to ensure that the hanger seals were holding properly
- The annular preventor on the snubbing unit was opened and the landing joint was backed out of the tubing hanger. The landing joint was pulled out of the stack and laid down. The workover rigs blind rams were closed.
- Project completed and snubbing unit was rigged out
“Land and Latch” Sand Clean Out
- A dual zone completion well
- A packer and tailpipe was set between two zones at 2600m inside a string of 177mm casing
- A wire line retrievable plug was set inside the on/off slick joint on top of the packer
- The top zone was perforated and then a casing fracture job using sand propagant was performed on the top zone
- A sand column of 20m was tagged above the packer with wireline
- The well operator wished to install a production string of 73mm tubing and latch onto the top of the on/off tool above the packer
- A double workover rig was on location. The crew installed a double gate and annular Bop stack on top of the tubing spool. All the well control equipment was 179mm x 35mpa. The lower Bop contained blind ram fronts, and the top Bop was dressed for 73mm tubing. The blind rams were closed and locked, and the surface pressure was 11mpa.
Process:
- A hydraulic rig assist was installed on top of the rig’s Bops.
- The BHA was to be assembled as follows: On/off skirt c/w seals installed; 3m x 73mm pup joint; “X” profile nipple c/w plug in place; 60m x 73mm pup joint; 1 joint 73mm tubing; Four 3m blast joints; 3m x 73mm pup joint; Sliding sleeve c/w “X” profile; 73mm tubing to surface
- The assembly was lowered into the stack and the single joint was made up to the BHA
- The BHA was lowered into the stack until the 3m pup joint was across the lower stripping rams. The stationary snubbers, traveling snubbers and traveling heavies were closed on the joint. The jack was used to pull tension into the pipe
- The snubbing unit annular preventor was closed and the stack was equalized using the snubbing unit equalize line. The unit was checked for leaks
- The lower stripping rams were closed and the stack above them bled off. This checked the integrity of the lower stripping rams
- The stack was re-equalized and the lower stripping rams opened. The workover rigs blind rams were unlocked and opened
- The unit then snubbed in the BHA, including the blast joints and sliding sleeve. Pipe was snubbed into the well until change over to pipe heavy mode
- The workover rig continued to strip in the hole using the snubbing unit annular as primary well control
- The sand on top of the packer was gently tagged with the on/off skirt
- The tubing was raised up to the first connection and a slim hole stabbing valve installed on top of the string. This valve has an OD smaller than the ID of the production casing
- A flow tee was rigged in on top of the stabbing valve and a flow line tied from the valve to a manifold on the ground. One side of the manifold was tied to the casing and the other side tied to a separator or flare stack. The manifold was aligned so the casing gas was directed into the tubing. The entire string was equalized
- The stabbing valve was closed and a wireline unit rigged in on top of the flow tee
- The plug was pulled from the “X” profile nipple above the on/off skirt
- The stabbing valve was closed and wireline rigged out
- Another slim hole valve was made up on a single joint. The valve was left in the open position and a flow line was tied back to the manifold on the ground
- The manifold was aligned to equalize the flow line and single joint using casing gas
- The lower stabbing valve was opened and the manifold aligned to flow the tubing string to the separator/flare stack
- Once a good flow rate was established, the tubing was slowly lowered into the well using the workover rigs blocks. The sand began to flow up the tubing and out of the well
- This process was repeated using as many valves as necessary, until the on/off skirt engaged onto the packer slick joint. The tubing stopped flowing, indicating a good latch
- The string was pulled into tension to double check for a good latch. The string was then lowered to neutral weight and carefully marked at the top of the snubbing unit
- The manifold was aligned to re-equalize the tubing string
- The string was rotated while being raised to disengage from the on/off tool
- Once off the packer, the string was raised until the first valve out of the hole was at the work floor level of the snubbing unit. The valve was closed and the surface circulation equipment bled off
- The top joint was laid down and a flow tee was installed on top of the stabbing valve and the circulation line tied in. Wireline was rigged in on top of the flow tee. The system was equalized using the manifold
- A plug was set in the “X” profile in the sliding sleeve. Aligning the manifold to the separator/flare bled off the tubing string
- Wireline was rigged out and the tubing stripped out to remove all the slim hole valves. All equipment was carefully measured as it was pulled out
- The distance was called as 32m. A measurement from the top of the snubbing unit to the tubing hanger bowl was made and showed a length of 8m. This distance was subtracted from the 32m to give a distance of 24m
- Once the distance was known, the same amount of tubing and appropriate pup joints were added to the string
- The tubing hanger was installed on the top of the string with a landing joint installed on top of the tubing hanger
- The tubing hanger was staged into the stack using the snubbing unit stripping rams and annular
- The string was lowered until the on/off tool latches onto the packer. The string was pulled into tension to ensure a good latch. The string was then lowered until the tubing hanger engaged into the tubing spool
- The hold-down screws were engaged onto the hanger and the stack slowly bled off to the separator through the snubbing unit bleed-off line
- The stack was visually checked at the kill spool valves to ensure the hanger seals were good
- The snubbing unit annular was opened and the landing joint removed from the hanger. The joint was laid down and the workover rigs blind rams closed
- The snubbing unit was rigged out
Lubricating out Tubing Conveyed Perforating Guns
Type of well: Gas
Depth: 3200 m
Situation:
This well was a 3200m gas well that had been perforated utilizing a set of tubing conveyed guns. The well operator wished to remove the perforating guns and install a packer in the wellbore. The surface pressure was 21mpa, and a list of the down-hole equipment was as follows:
Bottom Hole Assembly
Bullnose———————————————- .25m
Perf Gun———————————————- 2.0m
Blank Section————————————— 3.0m
Perf Gun———————————————- 7.0m
Firing Head—————————————— 2.41m
73mm Pup Joint———————————– 3.0m
73mm Fill/Flow Sub——————————- .22m
1 Joint 73mm Tubing—————————– 9.71m
“F” Profile Nipple c/w Plug in Place——— .30m
Tubing to Surface——————————— 3190m
Tubing Hanger————————————- .32
- A double workover rig was on location and the team installed and pressure tested a 179mm x 35mpa Bop stack on the tubing spool, which consisted of a kill spool, double gate Ram Bop, and an annular preventor. The tubing hanger was landed.
Process:
- The rig assist unit was installed on top of the rig’s Bops. A landing joint was lowered into the stack and screwed into the tubing hanger. The snubbing Bops were tested using the rig pump to 35mpa
- The stack was equalized using the snubbing unit equalize line to well bore pressure. The hanger hold-down screws were backed out and the tubing hanger staged out using the snubbing units annular and stripping rams
- The tubing was stripped out of the hole in heavy mode using the rig blocks. All tubing was racked in the derrick of the rig
- Every tubing connection was staged out of the hole using the stripping rams and annular. The pressure at 21mpa made pulling the connections through the annular with pressure under it unwise. Before the connection was pulled through the annular, the lower stripping rams were closed and the pressure between the rams and annular vented to flare. Once the connection was through the annular element, the chamber between the Bops was re-equalized and the stripping ram opened. This process was repeated for every connection
- Once the lift force from the well overcame the weight of the string, the snubbing unit took over pipe movement. The tubing connections were still staged out and the pipe continued to be racked in the derrick
- Once the BHA was at surface, the last joint of 73mm tubing with the Fill/Flow sub below it was stopped in the stack. This placed the 3m pup joint below the fill/flow sub across the lower stripping rams
- Note that the inside of this last joint was pressurized because of the holes in the fill/flow sub. The plug in the “F” profile on top of the joint was controlling the well pressure from flowing out the tubing
- The lower stripping rams were closed and the stack bled off above the rams The pressure inside the joint also vented during this procedure. The firing head of the perforating gun was sealed and now controlled the ID side of the string
- The joint was gently snubbed up until the fill/flow sub was above the snubbing unit annular element. The operator continued to raise the tubing until the lower connection of the 3m pup joint engaged the bottom side of the stripping rams. The rams were locked and the chamber between the stripping rams and annular was re-equalized
- At this point the snubbing slips were released from the tubing. The stripping rams held the pup joint in place
- The joint was gently snubbed up until the fill/flow sub was above the snubbing unit annular element. The operator continued to raise the tubing until the lower connection of the 3m pup joint engaged the bottom side of the stripping rams. The rams were locked and the chamber between the stripping rams and annular was re-equalized
- The snubbing slips were released from the tubing. The stripping rams held the pup joint in place
- The tubing joint and fill/flow sub was broken out and laid down. The top of the 3m pup joint was now exposed above the snubbing unit annular
- The snubbing unit jack plate was removed from the cylinders. The stationary slip assembly was removed from the unit. This left the top of the snubbing annular’s 179mm x 35mpa connection exposed
- A 35mpa wireline flange complete with port and valve was installed on top of the snubbing annular
- A 177mm wireline lubricator was assembled on the ground of sufficient length to accommodate the length of the remaining BHA. All associated equipment such as sheaves and grease injector pack-off were rigged in
- The wireline was fed through the lubricator and the rope socket was left hanging out the bottom of the lubricator
- The lubricator was picked up and hung above the wireline flange on top of the annular. The rope socket was connected to the top of the 3m pup joint
- Tension was pulled into the wireline using the draw-works of the wireline truck. The wireline was marked for a reference point
- The lubricator was slowly equalized
- The snubbing unit annular was opened. The snubbing unit stripping rams were unlocked and opened
- The BHA was pulled up into the lubricator by the wireline unit’s draw-works. A careful measurement was made from the reference mark on the line to ensure that the BHA cleared the workover rig’s blind rams
- Once the BHA was inside the lubricator, the blind rams were closed and locked
- The entire stack and lubricator was bled off to flare using the snubbing unit bleed-off line
- The lubricator and BHA were laid down, and the snubbing slips and jack plate reassembled
- The unit was prepared for tripping in the final production string